What Are ComfyUI Nodes? Reading the Default Workflow
What are ComfyUI nodes? Read the default workflow from the left, and the boxes and wires become a simple recipe in six steps. I'm Labo, the lighthouse keeper. Today: what a ComfyUI node is, and how the default workflow connects, box by box from the left. Read it in order and a node graph is just a recipe: ingredients (model), order slips (prompt), bake (KSampler), take out (VAE), serve (save).

Six boxes joined by wires make one road to one picture.
Last time we talked about keeping drawings on my own computer instead of AI art sites. In a Korean webtoon studio, unfinished pages are the work itself. So on June 5 I moved from SwarmUI to the engine behind its buttons, ComfyUI, sharing SwarmUI's model folder. The student, whose dad draws webtoons and never gets a day off, installed it herself; she wants to help him draw his manga with AI at home. Then she opened it.
"ComfyUI is all boxes and wires. What are they?"
Student: Labo, I got this screen. A few boxes tangled up with lines. Are these nodes?
Labo: Yes. Each box is a node, and a node does one job: load the model, read your words, draw, save.
Student: And the lines?
Labo: A wire is the road the result travels on to the next box. Boxes plus wires are the order a picture gets made in: a graph, or workflow.
Student: Like a recipe. Get the ingredients, prep, bake, plate.
Labo: Exactly. Let's keep that.
"Can we connect the default workflow one box at a time, like a recipe?"
Labo: Best way to learn it. Double-click the empty background, type a box name, and it appears. Drag from a dot on a box's right side (what it gives) to a dot on the next box's left side (what it takes). Six boxes, in order.
1. Load Checkpoint: ingredients. It loads the base model; because I shared folders, my SwarmUI models were already listed. It gives three things: MODEL (the part that draws), CLIP (turns words into numbers the AI understands) and VAE (unpacks the AI's compressed picture into one we can see).
Student: Three things in one file?
Labo: One checkpoint packs all three. ComfyUI lets you plug each in where it's needed.
2. Two CLIP Text Encode boxes: order slips. One says "draw this" (positive prompt), one says "leave this out" (negative prompt). Both take CLIP from box 1 and give CONDITIONING, your words turned into directions.
Student: They look identical. Which one is positive?
Labo: Where you plug it decides. You can double-click the titles and rename them.
3. Empty Latent Image: a blank canvas. My default for a tall panel is 832×1216. "Latent" means the AI paints on a small canvas of numbers, folded to an eighth of the width and height, and unfolds it at the end. Much less to calculate.
4. KSampler: bake. This box draws. It takes four things: model, positive, negative and latent_image. Inside, seed is the starting number (same seed, same settings, same picture), steps is how many passes it draws in, and denoise is how much of the canvas it repaints: 1.0 when starting from blank.
Labo: On my 3050, SDXL at 30 steps took about 10 seconds a step, six or seven minutes a prompt. And remember denoise. I once got badly lost over it.
5. VAE Decode: take it out of the oven. KSampler still gives a folded LATENT. This box takes it plus the VAE from box 1 and finally gives an IMAGE.
6. Save Image: serve. It saves the picture in ComfyUI\output. Press the run button (Queue Prompt or Run, depending on version) and the boxes light up in turn.
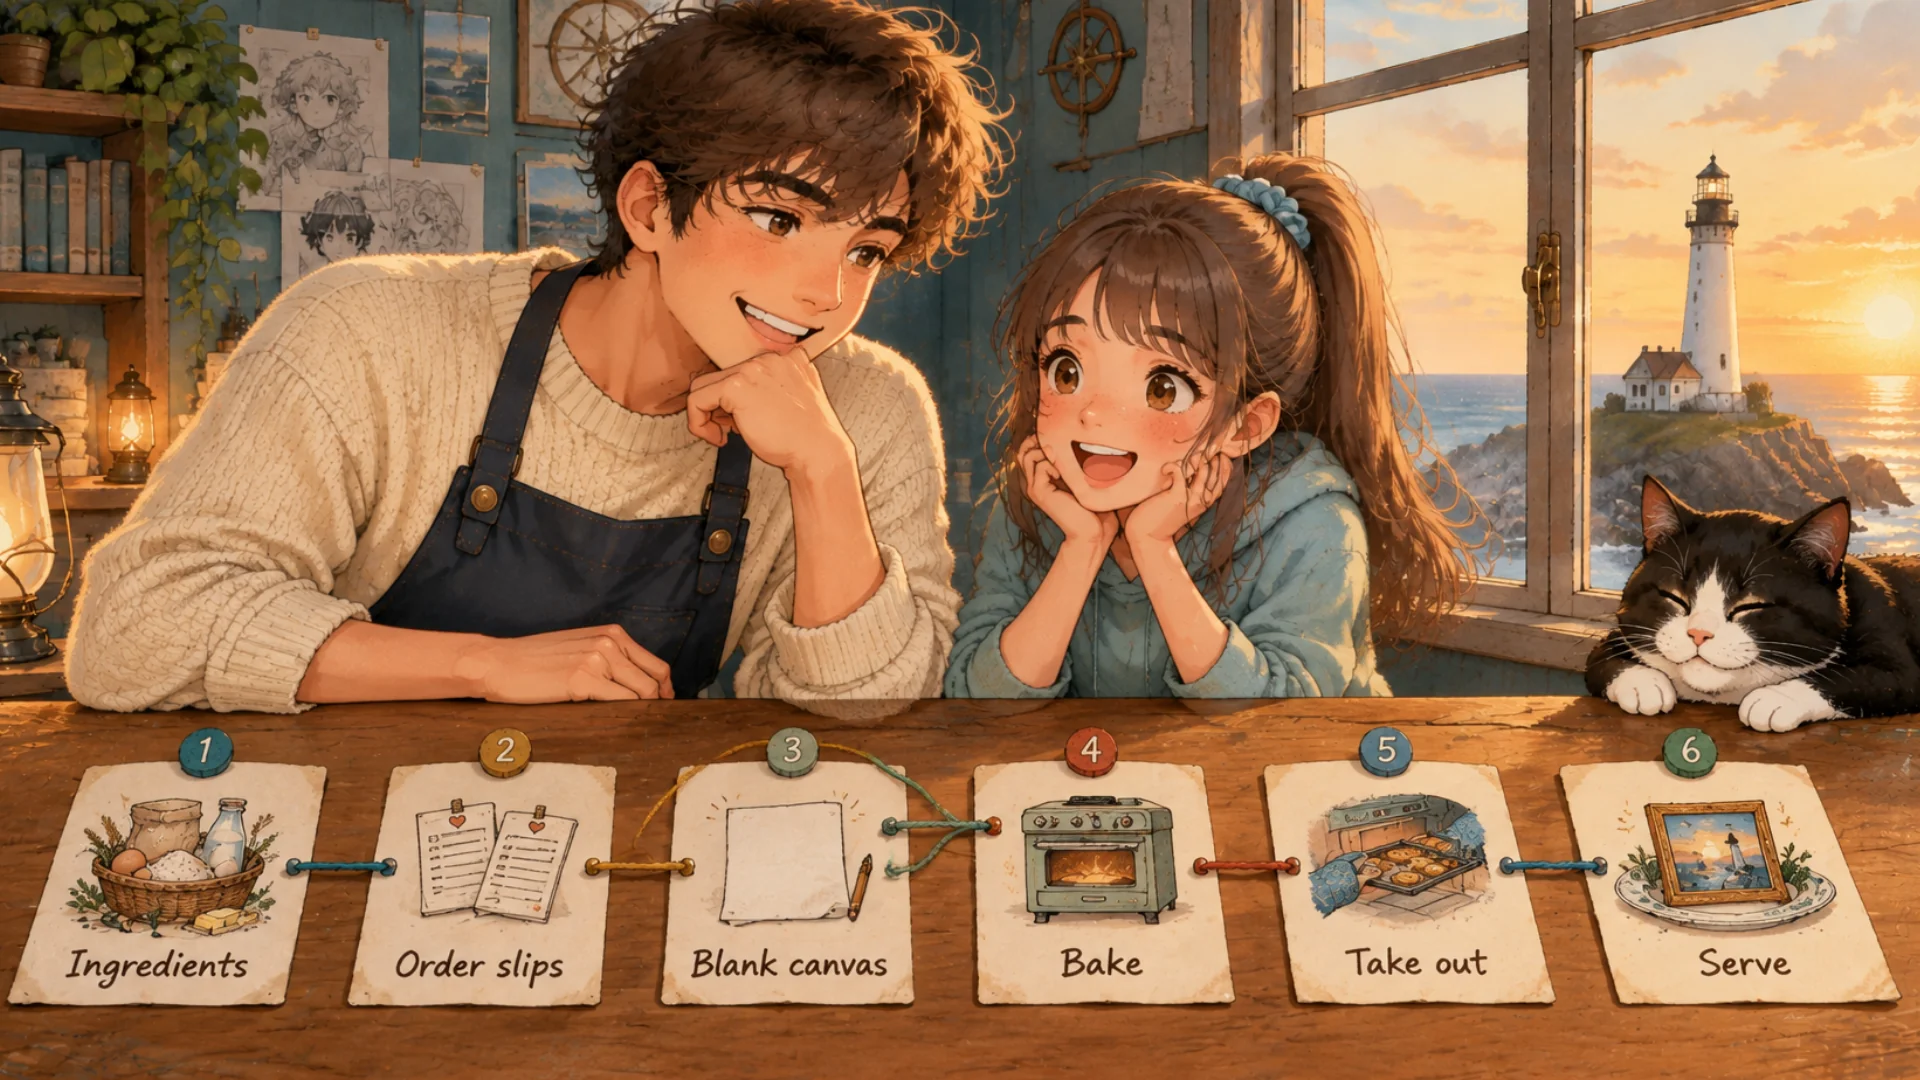
Ingredients, order slips, a blank canvas, bake, take out, serve.
"Why won't this wire plug in?"
Student: I'm trying to plug VAE into KSampler and it won't go.
Labo: That's ComfyUI protecting you. Every dot has a type, shown by wire color, and only the same type connects. KSampler has no VAE slot.
Student: So I can't plug anything in wrong.
Labo: Not the wrong type. But swap positive and negative and both still fit, so "draw this" becomes "leave this out." If a picture looks strange, follow those two wires first. A box that turns red has an empty input.
"Where does my style LoRA go?"
Student: What I really want is to put a style LoRA on. Is there a box for that?
Labo: Load LoRA, right after box 1. MODEL and CLIP go into it; its MODEL goes on to KSampler, its CLIP to both prompt boxes. A LoRA touches both, so it has two strengths, strength_model and strength_clip; 1.0 is full, lower is lighter. Pick a file from models\loras, say lbtoon01.safetensors, and start the positive prompt with the trigger lbtoon01. Two LoRAs? Chain a second box after the first, like train cars.
Labo: This little box is where a consistent character across panels starts: the style first, then each character, one LoRA at a time.
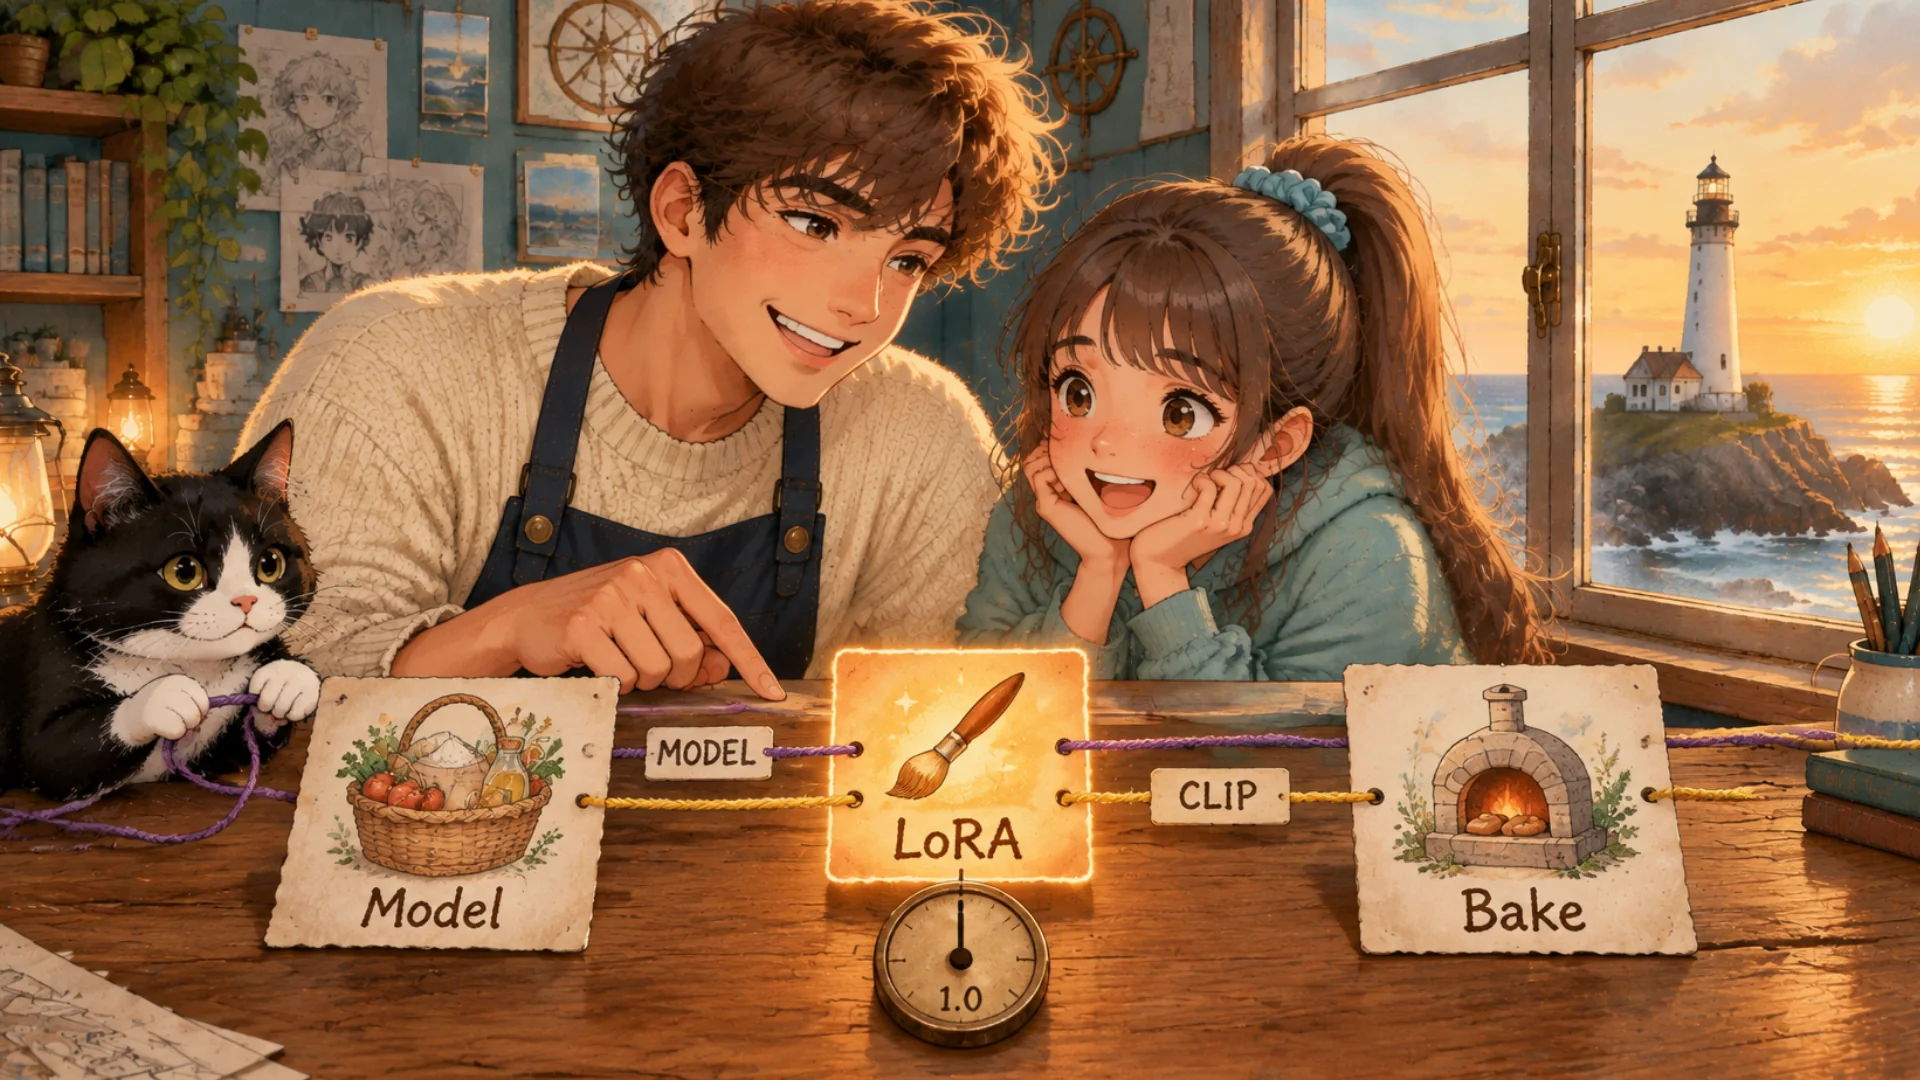
Both threads, MODEL and CLIP, pass through the LoRA card.
"So the SwarmUI buttons were this all along?"
Labo: Yes. Press Generate and SwarmUI builds a graph like ours from your values and hands it to ComfyUI; it even has a tab where you can see it. The model picker is Load Checkpoint, the LoRA list is Load LoRA, resolution is Empty Latent Image, Steps and Seed are KSampler.
Student: Then why wire it by hand?
Labo: For these six, SwarmUI is easier. But one day you'll want another box in between: one that follows a sketch, one that redraws only the face. Then wires beat buttons.
Student: So now I can hook up my LoRA files and compare them?
Labo: That's where I got lost. Next time: the day my epoch 4 file and my epoch 6 file drew the exact same picture.
Student: Wait, what's an epoch? And why is "the same" bad?
FAQ
Q. What is a ComfyUI node?
A box that does one job. Wires between boxes set the order.
Q. What order does the ComfyUI default workflow go in?
Load Checkpoint, two CLIP Text Encode boxes (positive and negative), KSampler (which also takes a blank canvas from Empty Latent Image), VAE Decode, Save Image.
Q. Where do I connect a LoRA in ComfyUI?
Put Load LoRA between Load Checkpoint and KSampler, and route both MODEL and CLIP through it.
What the artist did: wired six boxes in order, wrote both prompts, chose the size (832×1216) and slotted in Load LoRA.
What the AI did: KSampler drew on a small folded canvas; VAE Decode unfolded it into a picture.
Official pages: ComfyUI on GitHub (open source, free), ComfyUI official docs (node explanations) and SwarmUI on GitHub (open source, free). GitHub is a site where code is shared in the open, so anyone can see what's inside before running it.
Written October 2026 from Labo's records and the standard ComfyUI default graph. ComfyUI updates often; button names and menus may change. The original Korean post: ComfyUI 노드, 기본 워크플로는 어떻게 이어요? (Korean)
Lighthouse log. A node graph is a recipe: ingredients, order slips, bake, take out, serve. Lamps joined one by one in a line become a sea route.
Keep reading
- Previous post: Is It Safe to Upload My Drawings to AI Art Sites?
- More on ComfyUI · beginner
- All posts in Draw Manga with AI at Home


Comments
Post a Comment